Getting older and wiser certainly has its perks. As a young fella I would rip into anything at a hundred miles an hour, just to try and save time and get a task done and out of they way.

But now with a bit of ripening in age and experience, I have learnt that I can accomplish more by slowing things down and going through a more thorough thought process.
Thinking about things step by step and how it all flows together is the secret ingredient to becoming an efficient and productive entrepreneur.

As an entrepreneur and business owner, the benefits of documenting processes as you go is a great practice to master and an even better one to mould into a routine habit.
Overcoming hurdles and problem-solving is a daily practice, facing new problems for the first time in particular.
Systems and processes are essential in not only streamlining your business but in guaranteeing growth as well.
Simply put…documenting procedures are the answer to the common question “How to build a business?”
In this article, I share all the tips and tricks that I have learnt and implemented using an 11-step process creation procedure.
So what is the best way to start creating processes for your business?
Have you ever tried to explain to a team member how to complete a detailed task from memory on something you did only once?
I have and, unfortunately, it didn’t work well for me.

If you have the ability to document how you overcome these problems, then not only will you have valuable resources for next time but so will everyone else within your company, minimising the amount of time spent on solving this problem again in the future.
In other words, creating processes is like leaving a trail so you can go forward and lead the way for staff.
Procedures should be documented as you go, enabling you to break a process down and get an accurate step-by-step account of exactly how you achieve the task.

Most entrepreneurs plan to go back and document the technique after overcoming a problem or completing a job.
But guess what? They usually don’t get around to it and all that hard work and effort disappears entirely!
Trying to write a process later often misses out crucial steps, leaving pitfalls for the next person that follows the procedure, causing more problems and costing more time in productivity.

What if you had the discipline to write a complete guide step by step as you went through the task the first time?
Also noting any errors you made so that the next person could complete the task again with little or no errors.
Yes…I know what you are thinking!
Documenting a process does take a lot of time and attention to detail.
I even bet that you have attempted to create processes and given up purely because of the time involved.
However, the time you get back, in the long run, is certainly worth far more than 10 times.
the investment initially.
Here are a few good reasons why you should document everything as you go:
- Thorough problem-solving process;
- Automated knowledge transfer;
- Fewer questions are asked;
- Saves you from making the same mistakes again and again;
- Consistency;
- Increases productivity and saves time;
- Decreases costs;
- Provides business agility;
- Team and Freelancer compliance;
- Helps you and your business grow;
- Ease of outsourcing tasks;
- Eliminate flaws;
- Improves overall quality; and
- Frees you up!

Using a business process example this is the 11-step documentation procedure that I go through:
Step 1: Process Title
Write a precise title for your procedure so that the reader knows exactly what the process covers and what they will achieve by completing it.
For example:
Step 2: Process Brief
Write a quick paragraph that provides context and insert it underneath the title.
Step 3: Process Boundaries
Identify the precise start and end points.
- What triggers the process to start?
- And how you know when it’s complete?
Make sure that your process concentrates on one aspect from start to finish.
For example:
If the guide describes how to write a blog article it would need to be separated into a few different processes like “How to select a focus keyword for your blog post”, “How to research a topic to write a blog post”, etc.
Step 4: Process Steps
Take note of the steps that need to be followed to get the process from start to finish as you go through and complete the task, solving your problem.
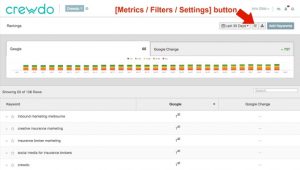
Get detailed! Use links to helpful resources if necessary and screenshots where you can.
I do this in a Word Doc so that I can easily edit steps as I go forward or backwards solving the problem and completing the task.
I also use PicMonkey to edit any screenshots adding things like arrows and comments. Best of all it’s free!

For example:
Step 5: Process Organisation
Take all the steps you identified and make sure the sequence flows and the identified decision points make sense and cannot be confused.
The process documentation template that you use to create all of your procedures should be simple but effective and very easy to follow.
This is where I spend more time editing screenshots with PicMonkey and adding further links to the process to provide any valuable resources as references should the reader need clarification or education.
Step 6: Process Review
Take a look at the sequence as a first quality check.
Does it look complete based on the boundaries you defined in Step 3?
Step 7: Process Roles
Identify the roles that will be completing each step. If a specialist team member is needed in any of the steps throughout the process be sure to outline this so that the person following the guide knows who they need to collaborate with.
Step 8: Save Process
Categorise your procedure and save it in the appropriate category of your process hub.
I use Google Drive as my process management system because it is simple, straightforward and works well for collaboration with my team.
![]()
Step 9: Final Process Review
Get anyone that will be following the process to trial or review it and make any further suggestions or comments.
Step 10: Approve Process
Should the procedure need further clarification or editing after your teams review make any necessary changes and secure approval from all team members.
Step 11: Update Process
As you and your team complete the procedure repeatedly over time, make sufficient changes and updates improving the process.
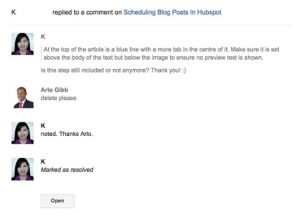
The other reason I use Google Drive for this is that my team can highlight a section of the process and make comment without changing the procedure. I will then be notified by email and can access the process and comment from a link within the email to reply to the comment, make the necessary changes or instruct team members to make the necessary changes.

So what other process documentation best practices are important?
How your processes should be stored:
Make sure your procedures are centrally stored on your internal drives. Google Drive will do this automatically but will also let you select which files are synced and which are not should you choose too.
Organising your process and information system:
Segmenting your procedures by departments for example sales, marketing, operations or administration and by level of role within your company is a great way to organise your process database if you run a large company.
You don’t want your whole team having access to all of your resources for security purposes. Make sure only the people that need to have access to those procedures, get access to those files.
Focus on Collaboration:
Emphasise the importance of processes with your team. With more and more team members working off site, your system should enable users to collaborate seamlessly.
Your team needs to access files simultaneously without having to log out, and they need to track revisions and document versions in detail. Make sure that the system you implement catalogues all changes and lists document versions in logical order so that your team can reference previous instances quickly.
If you found this process documentation guide helpful be sure to share it with those who may find it useful also!
